Shelley Made

Monday, 30 June 2014

A School Project

My daughter loves to draw - it's her favourite activity along with reading.  Both of which I'm very happy about!  I had an idea for a little project that I knew she would enjoy - a pencil case with her own artwork on it, but wondered if her classmates would like to join in too.

I had a chat with her lovely Year 2 teacher, and she thought it would be a great idea - so I designed a template for them, and came in to class at art time a few weeks ago.

We showed them some examples of my daughter's art already printed on fabric - and also a finished pencil case.  We also explained the concept of a repeating pattern to them - and that I would take their little drawing, and repeat it over the fabric just like on their clothing!

The result - a bit of a designing and sewing marathon and 25 brilliantly colourful pencil cases!!  They are made of a hardwearing canvas - which can be washed and should last the test of time...


We had them draw a larger design for a centre panel with their name on it - and a small design that would be used as the repeat.  Even my 4 year old joined in - sitting very nicely with the "big kids" - and to my surprise having a go himself!  He never usually participates in anything arty at kindergarten - so I was overjoyed to see him sitting with a drawing implement in his hand!

The class of 6 year olds were incredibly focussed on their work - and very excited that it would be turned into something they could use.  This was my daughter Jessie's finished artwork - her Mermaid Princess:


With her "coordinate"...


And this is the finished pencil case - front and back


I was very very happy at the amount of detail that came through on the fabric - and the vibrancy of the colours we were able to reproduce.

My added bonus - little Mikey's one...will be keeping these both as little treasures I think :)


I have to say it was one of the most rewarding projects I've undertaken - the sheer delight from the kiddies when I returned a few weeks later with their sewn pencil cases was amazing!  So worth the time I put into them :)

Year 2 is a great age to do them as a project too - they've settled in, can write and draw pretty well by now, but are still super excited to do something like this as an activity.

Here are my two kiddies with a photo Jessie's teacher emailed through from the day we handed them out at school - thank you Mrs Miller!


There is now a lovely big display up in the classroom showing the original artwork, and photos of all the kiddies each with their pencil case - great work everyone!!

I want to say a BIG thank you to the lovely ladies in a Fabric forum I belong to - for helping to cover the costs of the fabric for the class.  I had some spare blank space on the yardage I needed to order - so I offered some personalised pencil case panels up to them.  They were snapped up very quickly - and I am very grateful to you all - THANK YOU!!!

Tuesday, 8 April 2014

Hidden Zipper Pillow Tutorial


Don't be afraid of the zip!!!  That's what I was going to call this tutorial - but I thought it probably wouldn't come up in the right searches! :)

Sewing an invisible zip into a pillow or cushion (depending on where you live, and what you call it) is not scary.  Really.  Truly.  Hopefully this tutorial will show you that!  It also makes a lovely, professional looking cushion.

I've used my own fabric designs here - but you can use any piece of fabric you like - at any size you like.  A fairly standard size seems to be 18 inches - which is also the length of a Fat Quarter, so that's what I've gone with.


You will need:

  • 2 pieces of Fabric - 18"x18" inches (45.75cm by 45.75cm)
  • Coordinating thread
  • Scissors or rotary cutter and mat
  • 1 invisible zipper (I used 16" long)
  • A zipper foot (either regular zipper foot or an invisible zipper foot)
  • A pillow/cushion insert


Step One - Prepare

First you need to get your squares ready.  Cut them out to size, then you want to protect the edges from fraying.

To do this - you can either use a zig zag stitch right along the edges of each piece on your sewing machine, OR you can use an overlocker/serger like I did in the examples, OR you can use pinking shears if you have them.


Finishing the edges like this before you start to sew will make it a whole lot easier, and tidier than trying to do it at the end.


Step Two - Install the Zipper

In my images I'm using an invisible zipper foot - but it's not absolutely necessary.  I just prefer using one.  A regular zipper foot will work just fine.

First - open up your zipper, then line it up with the bottom of your front panel as shown in the next two images:


You want the zipper to be upside down, with the open end lined up at the far right - and the opened zipper head at the left.  Don't worry if your zipper doesn't go the whole length of the panel - as long as it will open up enough for you to get your insert in it's just fine!  This way, you can sometimes make do with a shorter (and cheaper) zipper if it is all you have to hand.


Now it's time to sew.  See where my finger is pointing in the picture above?  That's where we are going to start sewing...1.5" (3.8cm) in from the end.  Put a pin in there to remind you that's where you are starting.  Now, some people will say you should iron the teeth (the interlocking pieces) of the zip flat now - but I don't find that necessary.  I do raise them a little with my fingernail as I'm feeding it through the machine and I find that is enough.

Install your zipper foot.  In my case (with the invisible zipper foot), I needed to use the centre needle position, and line the groove up on the left with the zipper teeth.  I've moved the fabric through the 1.5 inches I needed, and now we sew as close to the right side of the teeth as we can.  Remember to backstitch both at the start and end of stitching.


Go all the way down as far as you can without hitting the zipper head! :)


Now - before you head off to do the other side - a tip.  Check you can close your zipper right now.  Before you go any further.  That way, if you have sewn a little too close to the teeth, at least you will know it's on this side - and it will make fixing it a lot easier :)  It's unlikely - but if the zip does catch, just unpick the stitches causing the issue, and re-sew just that section.

Right now - with the zip closed for testing, you should have something that looks like this:


Open that zip up again, and place your front and back panels together like this, so their bottoms meet!:


Now, grab that stray other side of the zipper - and place it so that it faces the opposite way to the first one - like this:


You are going to attach it exactly the same way as before...again, 1.5" down from the top...but with the fabric on the other side of your foot, like this:


It might seem strange to have the fabric on the right of the machine rather than the left - but I find I get my zippers lined up much nicer this way - as I am starting with the same end each time.

You should now have a fully sewn in zipper!  Well done :)


Step 3 - Complete the Cushion

To complete the cushion we need to do two things.  First, close the 1.5 inch gaps on each size of the zipper, then sew around the three remaining sides.

Fold the front and back panel together like this:


Your corner should match up nicely, and we now want to sew from where I am pointing - out towards the edge.

To close the gaps, I change to my regular zipper foot.  You might already be using yours, if you don't have an invisible zipper foot.  I want to get as close to my zipper stitching line as I can.  Being a little further in from the line is fine - in fact it helps to close up any gap you might have where the zipper can show through to the right side.  Make sure you pull the zipper out of the way while you sew.


I usually stop just a little in from the edge - when I hit the overcasting.


Take it out and turn it over - you should have something like this:


Now do exactly the same on the other end, so that it ends up looking like this when the zipper is closed:


Now VERY IMPORTANT.  Open your zip up.  If you don't it will be very very hard to turn the finished cushion through the right way. :)


I usually use the width of my regular machine foot to finish off the cushion.  Start at your top stitching line, and sew all the way around the three open sides.


So you should have something that looks like this:


Turn it through and your cover is complete!


Stuff with your favourite insert.  I used an 18" one which made it nice and plump.  Now admire your lovely hidden zip...


I hope you enjoyed the tutorial!
 

Monday, 17 March 2014

New Additions


I thought it was about time to offer a little variety in the Personalised range...  So, I've come up with some new layouts, which are available now!

As usual - available in any name, and your choice of colours from my colour chart.  The first three are three colour designs

First - we have SPOTS...


Then we have HEARTS...


Not forgetting STARS...because I love stars for babies :)


And last, but by no means least the DIAGONAL, which is available in four different text styles


BLOCK


SCRIPT


HAND
 
 
PLAYFUL
 
 
From now on - the old layout will be known as ORIGINAL


Ordering is easy - see my Personalised Designs page for information.  I hope you like the new designs!!!
 

Wednesday, 5 February 2014

Fabric Giveaway!!


Hi there...

To celebrate (?) my "milestone" birthday that is looming next Thursday - head on over to my Facebook page to enter to win a yard of fabric on either Basic Cotton, Kona, Poplin or Silky Faille!  You can choose ANY of my designs - either regular or personalised, and it will include my design fee if you need it customised.

All you need to do to enter is be a current "liker" of my Facebook page - like the post with the image above on it - and enter a comment with the design you would choose.  Easy!

(If you win and choose a cushion panel set as your prize - you will get a matching pair of panels on the yard)

The personalised options are all here

Or to browse my whole range see here

The contest closes at midnight Feb 13th 2014 - and the winner will be announced on Valentine's Day...

GOOD LUCK!

Friday, 31 January 2014

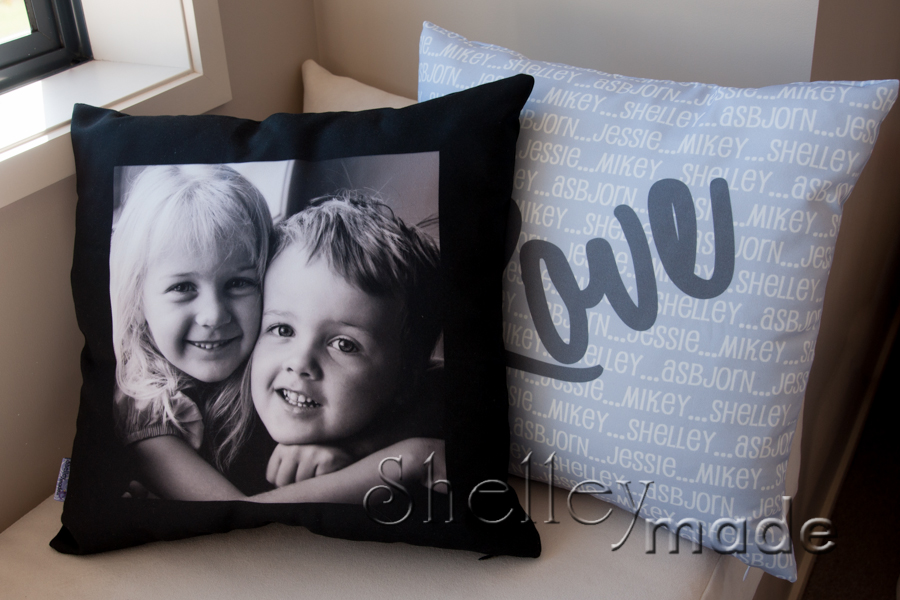
NEW Family Cushions


Hi everyone,

Today I'm introducing a new addition to my personalised range - "Family" cushions.

The panels make up into a very unique item, and would make a lovely Mother's Day gift, or for someone who has just completed their family with a new addition!

The front has your chosen family names repeated across it, in your choice of background colour...

Here are a few I have made up...

This one is printed on a beautiful matte satiny fabric called "Silky Faille" - so soft and lovely to snuggle against!


The backing fabric looks like this...


Another example, this time printed on a lovely canvas fabric...


I haven't decided whether to add these to my Etsy store yet to sell as completed items - it will depend on demand - but for now they are available to order as fabric cushion panels. 

The panels are 18 inches square, and are sold on a yard of fabric.  You will get two fronts and two backs (so enough to make a complete pair of cushions) on the narrower fabric options.  On 54 inch wide and above fabrics - you can fit three complete sets.

If you want all of your sets to be the same on your yard (e.g. a pair of matching cushion panels) - only one design fee applies.  If you would like each set to have a different name - then a separate design fee applies for each.

All the ordering details are on my Personalised Designs information page at the top of this site...

I hope you like this new addition to my range! :)  If you would like to be kept up-to-date with new additions like this - feel free to follow me on my Facebook page