Shelley Made: 2012

Saturday 29 December 2012

A Few of my Favourite Things...

Seasons greetings!


I hope you all had a lovely Christmas, and are looking forward to a wonderful 2013...

Time for a post that contains a few of my favourite things...

My daughter...sewing...designing fabric...swirls...the colour blue...and my brand new clothing labels!


This little top happens to cover off EVERYTHING listed above in one go!


It's the Fair and Square dress/top from Tie Dye Diva - made top length, using my Fancy Swirls fabric design in light blue - with a little bit of the reverse print for the flower:


I have to say - this is definitely my absolute favourite item I've made so far.  I love love the way it looks on my cheeky little girl.


Here are some of the details:


The bodice front...


The fabric - printed in poplin...


The bodice back...


The lovely matching seam! :) ...


The fabric flower, in the reverse print...


I was super excited to be able to attach on of my new woven labels to the top.  I ordered them not long before Christmas - and didn't think I would see them till the New Year. I was worried the little swirls I designed would not show through, but they did!  Luckily, they arrived mid-Christmas sewing...so the last few items I made I was able to include my own proper woven labels on.


I made some matching hairclips - using the GG Designs swirl clip cover pattern...


I've made this top/dress four times in the last month now...and I still love it!


Friday 2 November 2012

Matching Sunhat and Skirt

It was my niece's birthday yesterday.  A big 2 year old already!

She's a blue eyed cutie - so I designed a new blue and orange set of fabrics for her, and made them into a little skirt and reversible sunhat.


The sunhat is the Tie Dye Diva Sunny Day Sunhat.  I made mine with a straight brim, but she included a ruffle as an option.

It turned out pretty well I think...


On one side I used this personalised fabric...
Personalised Name Fabric - Handwritten Blue Daisies

...and the other is this one...
Orange Daisies

If you click on the images - you can see the full fabric repeats at Spoonflower.


I made up a special border print for the skirt, which is the Sassy Skirt from Sew Sweet Patterns.

I lengthened it a little - as the skirt is very short, and made it an adjustable waist - I wrote up a quick tutorial on how to do that here.


Then wrapped it all up in matching paper to send off in the post...with fingers crossed that everything was going to fit!


Another good day's sewing :)

Sunday 28 October 2012

What's Next...

What am I working on now...??

Here is a sneak peek at some of what arrived last week...


What could it be for???  That's right...my little boy's room makeover.  Doesn't look like much right now...but it is going to be a quilt, roman blinds, a lampshade cover, wall hangings, and anything else I can squeezed out of the fabric!

I might even get to do some sewing tomorrow...  Will be back to share!

Sunday 21 October 2012

Creating an Adjustable Waist

I love adjustable waists.  Why?  Two reasons.  First - I can make the clothes last longer...children grow like weeds!  Second - I make clothes for kiddies like my gorgeous little nieces that live a long way away...  I'm never sure of their measurements - so this takes the guessing out of it.

So, a quick how-to for you!  This tutorial will explain how to convert a regular skirt (or pants for that matter, now that I think about it) pattern, into one using buttonhole elastic.  It's really very easy.


Any pattern with a waistband will do, and you should be able to follow the instructions along.  This one is headed for my niece Lillie (hence - the Lillie-Billie on my fabric in case you were wondering!)

Here we go...

Follow your instructions until it comes time to sew your waistband piece sides together.

Take each piece - fold it in half lengthways - and give it good press to create a nice crease.


The crease is going to be the top of your finished waistband.  Place the two pieces right sides together, and you are going to sew as per the instructions - EXCEPT - we will leave a gap for the elastic to thread through, near the top of the inside of the waistband.  Start at the front of the waistband - sew down to the crease, keep sewing for 2-3 extra stitches past the crease.  Now backstitch to reinforce, and cut your threads.  Skip down the length of your elastic (mine was 3/4 inches).  Start sewing again - all the way to the end.


Closer up - it should look like this (except I've flipped it over to the other side in the photo - sorry!)


Repeat for the other end of the waistband.  Both elastic holes should line up.  If they don't - then you've done it on the wrong side!  Don't worry - just unpick and do it again. :)

Turn your waistband the right way through, and refold at the crease.

Take your elastic - and cut it about 2 inches longer than your waistband piece.  It just needs to be long enough to sit nicely unstretched.

Next, take your elastic ends and turn under just a little on each end.  Sew over them just to neaten and so they don't unravel (as in the photo below).


Take each end, and push them through the holes you made before.  I use a safety pin to secure them on each end.  You can thread the elastic into the casing later if you prefer - but it is so much easier to do it now while the waistband is not attached.
 
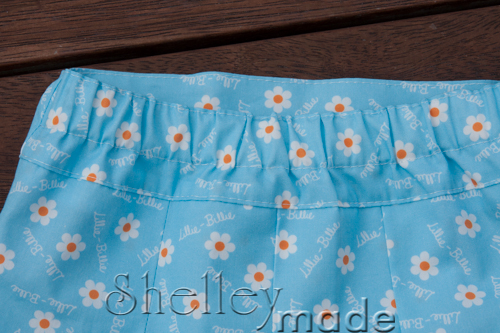
Now - attach your waistband as per your pattern instructions.  Then sew a casing, just along the wasitband back where the elastic is.  You want to push the elastic up to the top of the waistband (I usually topstitch first as in the photo), then sew your casing just in from the side of the elastic.  This keeps it nice in place, and stops twisting, etc.  Be careful not to sew into the elastic!  Otherwise you won't be able to tighten it.


You will end up with two ends that look like this:

The Left: 

and Right:


With the casing in between.

Lastly - you want to sew a button near each elastic end (pretty much where my safety pins were)...


Then give the elastic a bit of a tug...push the button through once..


...and then back again to give a nice finish:


Once you have done this on both ends - you are finished!  Carry on sewing the rest of your pattern to get an adjustable waist skirt like this:


With a smooth front


..and an elasticated back:


Any questions - feel free to ask!

Tuesday 16 October 2012

Fair and Square Dress

I'm finally sewing again.  This time, another of Tie Dye Diva's patterns...the Fair and Square Dress.

Nice and easy to sew, and nice and light for Summer.  I made a size 4 - with a 5 length, and it fits well.  My daughter is rather petite!


The bird fabric is my own design - available on Spoonflower here in blue, pink and purple - with loads of coordinates.  It's definitely one of my favourite of my own designs, and I love the way it has sewn up into this dress.

Some of the details...the flower:


The contrasting hem band:


The button closure at the back:


I made this slightly differently to the pattern.  I used one full yard width (as it was all I had!) - and put a single seam down the back, rather than two side seams.  I was about an inch short in width - but made some of that back by having one less seam allowance.  I'm pretty happy with my matching seam! :)


I think it looks pretty on my little girl...and I'm very happy with the end result...  I'm sure it will get a lot of use over Summer.

Friday 12 October 2012

Coloured Pencil Purse

I am always so excited to see projects created with my fabrics.  I've been an admirer of the very talented Jennifer Ladd on Etsy for some time now - so I'm SUPER excited that she has used one of my designs for one of her purses.

She has kindly allowed me to share her photos with you...

I so love what she wrote about my fabric on her Etsy page...it completely and utterly made my day!!!!!  Thank you so much Jennifer!
 
"The bag has a beautiful print of hand-drawn colored pencils in all shades of the rainbow on a bright white background. It was made by a very talented artist and independent fabric designer (Shelleymade). I love how the print looks so linear and geometric from afar, and a little quirky up close once you realize that the pattern is actually pencils."


She has this one up for sale right now - you can see the listing here.  There is only one - so you better be in quick if you want to snap it up! :)
 
Have a great day!