Shelley Made: January 2012

Monday 16 January 2012

Toys Toys Toys

Time to share the soft toys I have made over the last while.  It's not all about sewing clothes you know :)

I have an amazing sewing machine that also does embroidery.  It's one of my favourite possessions.  I was on the lookout for things that I could use the embroidery unit for - and came across a number of "In The Hoop" projects.  In particular, this site.  Gerda creates some wonderful patterns at Embroidery Outlet, and I have purchased quite a number of them. 

Having time to sew them up is another matter!  I will warn you - the patterns basically stitch together two sides of a piece - e.g. an arm, but everything else is handsewing.  A lot of handsewing.  Most things you see on a toy are a separate stitch out - nose, ears, eyes, etc.  There is a large amount of creative freedom here - you can decide where/how to attach each piece.  Gerda gives a finished photo as an indicator - but other than that you are free to place the pieces as you wish.

This was the first one I did...for my daughter's 3rd birthday


I googled instructions to do her hair as I was at a bit of a loss.  I ended up cutting numerous lengths of the yarn (double the length I wanted to do her hair), sewing across the centre of it with my machine to secure them.  I did about three sections (which meant 6 hair layers as you fold them at the seam), and hand sewed through my machine stitching to secure to the head of the doll.  Then when you fold it down - the seam is hidden.  Does that make sense?

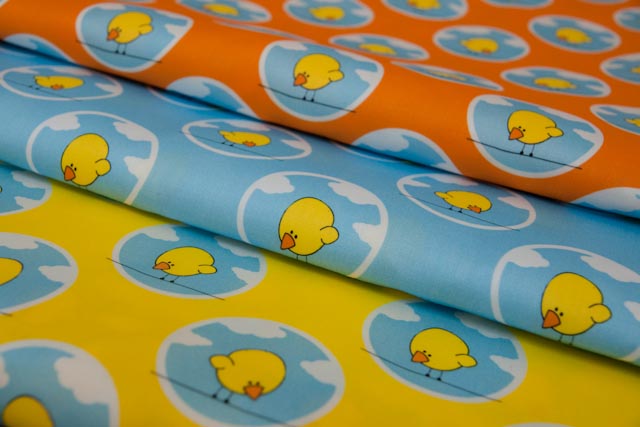
The dress was made for her using the pattern as a template for size only.  I prefer to sew with nice seams and hems rather than using pinking shears which is what the In The Hoop pattern calls for.  It is actually leftover fabric from my daughter's bed quilt!

Next up was a set of toys for my niece and her new baby sister.  I made what I call Scary Dolly for my niece (she calls it Aunty Shelley!).  The eyes are a bit strange!!!:


And cuddle bunny for her new baby sister.  He/she is the strangest bunny you have ever seen:


The fabric choice was determined by the minky I had left over from making a blanket for my new niece to go with the bunny, just in case you were wondering what possessed me!  It is super soft and cuddly:


After that, I thought my wee boy needed a toy, so Hippo joined the family.  He is another super soft cuddly toy.  I really like Hippo - he is just so snuggly:


I love the results of sewing with minky fabric - just not the complete mess I/my house gets in while doing it!!!  Fluff everywhere.

To finish off, along came my son's first birthday - so Giraffe was my most recent creation:


Yet another "finish in the middle of the night before" project!  Why do I do that???  Giraffe is currently awaiting some surgery to re-attach one of his hind legs.  Victim of a tug-of-war between my children...  Poor Giraffe.

Friday 13 January 2012

A Fairy Party

It's been a while since the day - but for my daughter's fourth birthday - she asked to be a fairy, and to have a fairy party.  Silvermist to be exact, from the Disney Fairies movies.

So on top of all the creating I was doing for her presents (Fairy House, Jewellery, Handbag, etc), I also needed to make a fairy dress.  Oh, and make a multitude of little edible flowers and leaves for her birthday cake and cupcakes...

I found this pattern Simplicity 2559.  It's the toddler size (because my girl  is a slender build).  There is a size 3-8 one available as well, but I was certain it would be way too big in  the chest/waist for her, so I just lengthened the toddler one.

My version ended up looking like this (the only time before the day I would let her wear it!):


The crinoline wings from the pattern were a nightmare - floppy and just were not going to work - so I opted for store-bought white ones, which I added turquoise crystals too, sparkly silver glitter swirls, and tied a swath of the turquoise tulle around to tie into the dress.

I put a zip into the back - the original asked for velcro, plus to velcro the wings on but it just wasn't going to look so nice if she ever wore it without wings, so I changed that.  I did make the original belt, but in the end used another length of tulle as a sash - which I could tie in a bow at the back.

You cannot see from the photos - but it was very shimmery and sparkly - particularly the tulle.  I added some of the sparkly tulle  from the underskirt over the satin on one shoulder of the bodice.

She was way too excited on the day to get any good photos, but here is the back:


The front (you can see the necklace I made her to go with it)


Plus the all important wand!


Altogether I think it turned out quite well.  I made matching slippers and a hairclip to finish it all off.  There were times I SWORE never to sew with satin and tulle again :), but I'm over that now!


Here is a better look at the jewellery I made her for her birthday - the colours matched the dress perfectly.  I had no idea how to make jewellery before this - it just shows you how much you can learn from googling!  That, and finding a good place online to order what you need :)


If you are wondering why she is wearing tights and a long sleeve shirt underneath - it was winter here! :)  We got very lucky on the party day - it was lovely and sunny and quite warm.

I did get everything done in time.  Just.  We had the cake, complete with all my handmade little flowers, butterflies and leaves (now those took a while!):


...and the cupcakes and little flower biscuits/cookies


The girls all made their own fairy wands.  We used dowels I had wrapped in advance with ribbon.  The head of the wand was made from sheets of stiffened felt.  Feels like cardboard - but furry!  I cut them out beforehand too.  The girls chose their colours, then added lots of sparkly self-adhesive "jewels", stars and extra ribbons.  All things that were fun, but not messy!  Best of all, they got to create them themselves, and take them home to play with.


Then they burnt off all the sugar they had eaten by running around playing fairies outside with their new wands.


The best thing about the entire day - the absolute beam on my daughter's face as she had the BEST time with all her little fairy friends... :)


Tuesday 3 January 2012

The One Yard Dress

I'm nearly at the end of my Christmas sewing.  Yes, I think I overdid it this year!

This is one of my favourites.  For a couple of reasons.  First - I designed the fabric myself.  Second - I had an idea of how I wanted it to look, but no pattern to match, so I made it up as I went along.

I designed a border print fabric.  I wanted a plain bodice, and stripes that increased in distance down the skirt of the dress.  I had my design printed on cotton poplin, and it looked like this (well - a straight, full width of the fabric version of this!):


I used an old, lined bodice pattern I knew fitted my daughter.  It had a zip in the back, but you could use one that buttons up either at the back, or like a pinafore at the shoulders.

I cut the bodice from the top section of the fabric.  Then I measured up 1.5 inches from the first white line - and cut the full width of the fabric off.  This was going to be my skirt piece.  There is only one seam at the centre back of the skirt piece. 

I made a couple of ties about an inch wide from a 2.5 inch strip of the leftover fabric.  I simply sewed a tube and turned through.  Very simple.  I sewed the ties into the bodice seam as I was making the bodice up.

To attach the skirt to the bodice I decided to use shallow pleats.  You could gather it by hand, or use a ruffler foot - use whatever your favourite method of reducing the full skirt width to match the bodice width is.  I liked the idea of little pleats rather than gathers - so went with that.

I sewed a deep hem as the full length of the skirt piece was a little long for my four year old.  I sewed along the bottom white stripe with white thread so you can hardly see the stitching.

Size wise - there was ample fabric for the bodice in the yard - I could have made it for a much bigger girl.  There is about 17 inches of plain fabric at the top - so any bodice that would fit that.  The fullness of the skirt is determined by the width of fabric.  You could use two yards to make a really full skirt.  You get about 19 inches in length of the skirt piece.

Here is the finished dress front

...and the back with the ties...


I nearly put patch pockets on the dress, but decided I could always add them later.  It probably didn't need them.  I did make a couple of ribbons for her hair though.


I think this is my favourite sewing project for her yet :)

Monday 2 January 2012

A Fairytale Dress

Yes, another sewing project for Christmas.  This one was kind of special - I just knew my daughter would love it.  Sometimes I make things that I like - and she is not too keen on!  But this one I was confident would go down well.

The pattern is another Tie Dye Diva one.  No - I'm not affiliated in any way :)  I got a bundle deal off the website!  You can find it here.

I found some butterfly poplin at Spotlight in one of her favourite colours (purple).  They also had some plain blue that matched for the underskirt and ties.

I made a size 2 width bodice - but size 4 everything else.  As with most patterns - I find a size 2 in the width is just right for my wee girl.

Here is the front:


...and the back...


...with a closer view of the bodice front.  I did not use ribbon for the lacing of the bodice.  I made my own out of the same fabric.  Why?  Two reasons - I could not face going back to Spotlight in the Christmas madness (!), and I also didn't think I would find a good match.


All in all I was pretty pleased with how it turned out.  It was not a hard pattern.  I was very happy when I had finished all of the hemming - but it was more time consuming than anything else :)

Christmas Day...it was the only item of clothing she was interested in wearing!  So yes, she did love it.


I think it looked pretty cute on her - don't you?


...and just right for more of the twirling that four year old little girls seem to love doing! :)

Something for the Boys

Another of my homemade Christmas presents - this time for my 22 month old little boy.  I find it hard, as I know others do, to find things - particularly things to sew - for boys.

I came across this pattern at Tie Dye Diva.  The "Awesome Baby Shorts" pattern - a downloadable pdf.  I like pdf patterns as a whole - however I've come across some that are not quite up to scratch.  Not the case with these - the instructions are clear, the patterns are computer drafted (which I really REALLY prefer to hand-drawn patterns).  Very professional.

I used Caleb Gray's Robot Factory fabric - which is a cute not too over the top print for a little boy.  Size wise I made him the 18-24 month (which is the largest).

Here they are, waiting to be wrapped:


The little patch pockets were very easy - I added a double line of stitching all around


Faux fly detail, and I put an extra line of topstitching around the top of the waistband.


The fit?  Pretty good.  I made no changes to the pattern at all - the length is good.  Love the pockets.  He is very much on the averages for weight and height for his age, so I was expecting them to fit well.  I would note that they would not fit him in his cloth nappies - Fuzzibunz.  There is just not the room for a well padded little bottom in these - but in a pullup they fit fine.  You would need to size up to accommodate cloth.


All in all - a good little pattern that sewed up really quickly.

Sunday 1 January 2012

The Twirl Skirt

One of the items I made for Christmas was the Tie Dye Diva Twirl Skirt.  It's actually a skort pattern, but I opted not to make the bloomers underneath.  I don't think my daughter is a bloomers girl!

I used my own special fabric.  A cotton sateen I designed...


I made a size 4 - mainly for the length as my 4 year old is a bit on the slender size!  Elastic takes care of that in the waist though.  It has a dropped waist, and a double sided ruffle at the bottom.

The pattern was easy to sew up.  The most difficulty I had was in trying to match up the design at the sides.  I just took them in little by little until the little birds matched up.

The finished product...


Does it twirl?  Yes!


Does she like it?  Yes!


My First Quilt - The Finale!

See here for the front and back of the quilt.

Hmmm...quilting and binding.  I am SO not brave enough to attempt free motion quilting yet.  Maybe one day...but not right now!  I decided to play it safe with straight line outline quilting.

First - the quilt sandwich.  I spread everything out on the bathroom floor - the biggest tiled area in the house which made it a lot easier to smooth and pin.  I used masking tape to hold the backing nice and firm.


Can you tell I'm left handed! :)


Then I started my quilting...  That took a while.  I had awful tension issues...needless to say my machine is in getting serviced right now...


I machine stitched the binding on the front - then spent many nights hand sewing it to the back.  Strangely I found it quite relaxing though.

The finished quilt!:


And the back.  I like the darker blue binding - kind of like a frame for the quilt.


Closeup of some of my quilting


And there is that hand stitching on the back of the binding...


With my little custom label proudly attached :)


I made a matching pillowcase out of scraps, as you can see on the little bed.


What did my son think of it - well this...


He pushes it off the bed before he goes to sleep EVERY night!  Oh well...