Shelley Made

Tuesday, 3 January 2012

The One Yard Dress

I'm nearly at the end of my Christmas sewing.  Yes, I think I overdid it this year!

This is one of my favourites.  For a couple of reasons.  First - I designed the fabric myself.  Second - I had an idea of how I wanted it to look, but no pattern to match, so I made it up as I went along.

I designed a border print fabric.  I wanted a plain bodice, and stripes that increased in distance down the skirt of the dress.  I had my design printed on cotton poplin, and it looked like this (well - a straight, full width of the fabric version of this!):


I used an old, lined bodice pattern I knew fitted my daughter.  It had a zip in the back, but you could use one that buttons up either at the back, or like a pinafore at the shoulders.

I cut the bodice from the top section of the fabric.  Then I measured up 1.5 inches from the first white line - and cut the full width of the fabric off.  This was going to be my skirt piece.  There is only one seam at the centre back of the skirt piece. 

I made a couple of ties about an inch wide from a 2.5 inch strip of the leftover fabric.  I simply sewed a tube and turned through.  Very simple.  I sewed the ties into the bodice seam as I was making the bodice up.

To attach the skirt to the bodice I decided to use shallow pleats.  You could gather it by hand, or use a ruffler foot - use whatever your favourite method of reducing the full skirt width to match the bodice width is.  I liked the idea of little pleats rather than gathers - so went with that.

I sewed a deep hem as the full length of the skirt piece was a little long for my four year old.  I sewed along the bottom white stripe with white thread so you can hardly see the stitching.

Size wise - there was ample fabric for the bodice in the yard - I could have made it for a much bigger girl.  There is about 17 inches of plain fabric at the top - so any bodice that would fit that.  The fullness of the skirt is determined by the width of fabric.  You could use two yards to make a really full skirt.  You get about 19 inches in length of the skirt piece.

Here is the finished dress front

...and the back with the ties...


I nearly put patch pockets on the dress, but decided I could always add them later.  It probably didn't need them.  I did make a couple of ribbons for her hair though.


I think this is my favourite sewing project for her yet :)

Monday, 2 January 2012

A Fairytale Dress

Yes, another sewing project for Christmas.  This one was kind of special - I just knew my daughter would love it.  Sometimes I make things that I like - and she is not too keen on!  But this one I was confident would go down well.

The pattern is another Tie Dye Diva one.  No - I'm not affiliated in any way :)  I got a bundle deal off the website!  You can find it here.

I found some butterfly poplin at Spotlight in one of her favourite colours (purple).  They also had some plain blue that matched for the underskirt and ties.

I made a size 2 width bodice - but size 4 everything else.  As with most patterns - I find a size 2 in the width is just right for my wee girl.

Here is the front:


...and the back...


...with a closer view of the bodice front.  I did not use ribbon for the lacing of the bodice.  I made my own out of the same fabric.  Why?  Two reasons - I could not face going back to Spotlight in the Christmas madness (!), and I also didn't think I would find a good match.


All in all I was pretty pleased with how it turned out.  It was not a hard pattern.  I was very happy when I had finished all of the hemming - but it was more time consuming than anything else :)

Christmas Day...it was the only item of clothing she was interested in wearing!  So yes, she did love it.


I think it looked pretty cute on her - don't you?


...and just right for more of the twirling that four year old little girls seem to love doing! :)

Something for the Boys

Another of my homemade Christmas presents - this time for my 22 month old little boy.  I find it hard, as I know others do, to find things - particularly things to sew - for boys.

I came across this pattern at Tie Dye Diva.  The "Awesome Baby Shorts" pattern - a downloadable pdf.  I like pdf patterns as a whole - however I've come across some that are not quite up to scratch.  Not the case with these - the instructions are clear, the patterns are computer drafted (which I really REALLY prefer to hand-drawn patterns).  Very professional.

I used Caleb Gray's Robot Factory fabric - which is a cute not too over the top print for a little boy.  Size wise I made him the 18-24 month (which is the largest).

Here they are, waiting to be wrapped:


The little patch pockets were very easy - I added a double line of stitching all around


Faux fly detail, and I put an extra line of topstitching around the top of the waistband.


The fit?  Pretty good.  I made no changes to the pattern at all - the length is good.  Love the pockets.  He is very much on the averages for weight and height for his age, so I was expecting them to fit well.  I would note that they would not fit him in his cloth nappies - Fuzzibunz.  There is just not the room for a well padded little bottom in these - but in a pullup they fit fine.  You would need to size up to accommodate cloth.


All in all - a good little pattern that sewed up really quickly.

Sunday, 1 January 2012

The Twirl Skirt

One of the items I made for Christmas was the Tie Dye Diva Twirl Skirt.  It's actually a skort pattern, but I opted not to make the bloomers underneath.  I don't think my daughter is a bloomers girl!

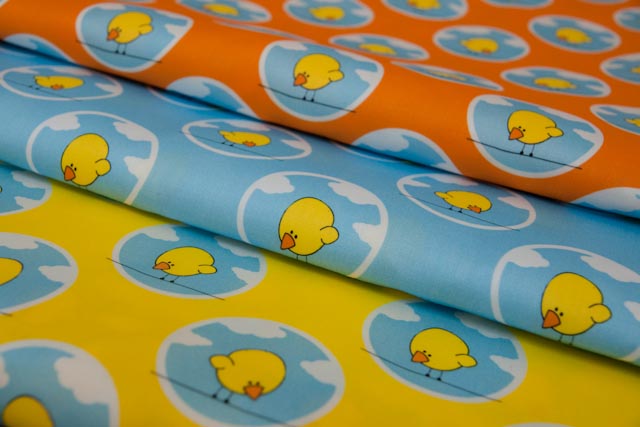
I used my own special fabric.  A cotton sateen I designed...


I made a size 4 - mainly for the length as my 4 year old is a bit on the slender size!  Elastic takes care of that in the waist though.  It has a dropped waist, and a double sided ruffle at the bottom.

The pattern was easy to sew up.  The most difficulty I had was in trying to match up the design at the sides.  I just took them in little by little until the little birds matched up.

The finished product...


Does it twirl?  Yes!


Does she like it?  Yes!


My First Quilt - The Finale!

See here for the front and back of the quilt.

Hmmm...quilting and binding.  I am SO not brave enough to attempt free motion quilting yet.  Maybe one day...but not right now!  I decided to play it safe with straight line outline quilting.

First - the quilt sandwich.  I spread everything out on the bathroom floor - the biggest tiled area in the house which made it a lot easier to smooth and pin.  I used masking tape to hold the backing nice and firm.


Can you tell I'm left handed! :)


Then I started my quilting...  That took a while.  I had awful tension issues...needless to say my machine is in getting serviced right now...


I machine stitched the binding on the front - then spent many nights hand sewing it to the back.  Strangely I found it quite relaxing though.

The finished quilt!:


And the back.  I like the darker blue binding - kind of like a frame for the quilt.


Closeup of some of my quilting


And there is that hand stitching on the back of the binding...


With my little custom label proudly attached :)


I made a matching pillowcase out of scraps, as you can see on the little bed.


What did my son think of it - well this...


He pushes it off the bed before he goes to sleep EVERY night!  Oh well...

My First Quilt - The Back with Custom Label

Having finished the front, it was on to the back.  Winging it this time as I have no pattern.  Funnily enough - piecing this together has given me the confidence to make a complete quilt from scratch - without a pattern.

To start with I created a custom quilt label.  Swatch size was more than big enough...  I tried to make it look like a part of the Castle Peeps fabric, and did my best to colour match. 

This is what I ended up with.  It's an 8x8 inch swatch...ready to cut.  Plus - it's all my own! :)  I ended up cutting it down to about 6 x 4 I think...  I read in a number of places that you should piece your labels in so they can never be removed..  Good advice!


I chose my favourite fabrics from the Castle Peeps line for the back...and started piecing.  I did a rough outline on paper before I started.


Resulting in this at the final middle section:


And overall this is the completed back...


Next, the last piece - quilting!

My First Quilt - Part 1!

After procrastinating for what seems like an age - I finally bit the bullet and attempted my first quilt.  It's for my son, who will soon move out of his cot/crib into a toddler bed.  So I guess that gave me the motivation!

I just love the Castle Peeps fabric line from Lizzy House and luckily she designed a lovely pattern to go with it to give me a starter.  I chose the blue colourway as my son's room is blue and yellow - and changed the design to be wider to fit his bed.  I also rearranged the fabrics and swapped a few in and out to make it my own.


Isn't the fabric great?!?!

What did I learn from my experience...  That if you are left handed - SWAP THE BLADE SIDE on your rotary cutter!!  I've struggled for ages with it veering off on tangents - so much so that I had put it away forever.  Which I guess is why I didn't make a quilt until now.  So I thought I would give it one more go - with a fresh blade - which is when I had the inspiration to reassemble it on the opposite side.  Magic.  I'm now cutting like a pro :)

So, after calculating and recalculating my changes to the pattern - I set off to cut nervously through all the fabric.


Ending up with this...which will be the front


I did my best when cutting the pieces to try and get the skyline to line up - it "kind" of worked!  I got close anyway.


 Ending up with the finished top...  Which I thought looked not too bad for a first effort.


Next up - the back!