
This is what I came up with...

The bodice and skirt are stretch panne velvet (in Rapunzel colours!). The long sleeves are a stretch interlock fabric. The elastic around the hems and neckline is stretch lingerie elastic. Can't get much more comfy than that!


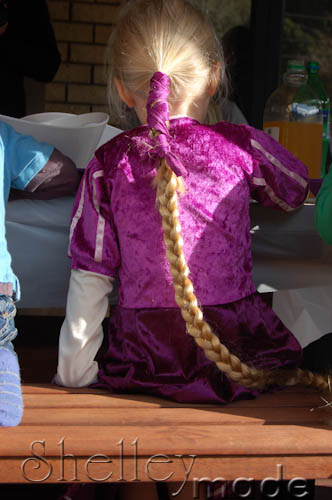
She loves it. Has worn it pretty much every day since her birthday...
I took a few shots of it under construction so you could see how I did it.
I drafted a bodice pattern from a long sleeve t-shirt I knew fitted well. Used the basic sleeve, front and back - altering the neckline to be more of a sweetheart-style. I also made a short sleeve - with gathering at the top - used the long sleeve pattern I drafted - cut it shorter, and added 2 inches to the centre, which I then gathered back in, to give the slight puff.
Ribbons...oh the ribbons! On the short sleeve - I spaced them out evenly, and topstitched them on. Then I added a double-thickness band to the bottom of the short sleeve which was the same width as the long sleeve - to again create the puff.


On the bodice - I sewed the front and back together at the shoulder seams. Tried it on her to make sure I was happy with the neckline. Then cut a 3.5 inch section out of the centre front. I replaced it with a section 4.5 inches wide from the skirt colour (to allow for seams) - which I had topstitched more ribbons in a criss-cross pattern.

Attached the sleeves, and sewed up the side seams of the bodice.

I made sure all my stretch was around the body for all parts of the dress...important to note!
The skirt is a half circle style, cut into panels. There are a number of tutorials on the web to help you calculate half circle skirts...I looked through a few of those to figure out my dimensions. I then divided it by 8 to get the single panel I needed. I used one panel in the bodice colour.
I sewed the skirt up - since it is stretch, I didn't need any openings or closings or elastic. Easy. Just joined all the panels up.

Attached the bodice to the skirt - trying to match up the front panel with the bodice insert! Used my overlocker to do that for maximum stretch.

To hem the skirt - I used lingerie elastic. Attached it with a zigzag stitch (right sides together), then topstitched it with a triple stretch stitch on my machine. Worked like a charm. I used the same method on the neckline, and sleeve hems.
The hair...better not forget the hair! I got a long wig from a local dollar store - cut sections of it out (leaving the stitching so it didn't fall out!), and make effectively extensions for her hair.

All in all - very happy with how it turned out...and even happier that she loves it!
I have a post from the party coming up next...


