Shelley Made: birthdays
Showing posts with label birthdays. Show all posts

Thursday, 4 October 2012

A Rapunzel Party

My little girl is 5.  Where did that time go?  Hard to believe she is a school girl now.

I had big plans for her 5th birthday party.  SHE had big plans...in fact - she had been asking for a Rapunzel party since she turned 4.  No pressure...!

So I planned, and researched, and did a fondant cake decorating course.  We had family flying up specially as a surprise for Jessie.  I was really looking forward to making it a super special day for her.

The day before her actual birthday, and 2 days before the party, I was hospitalised with Pneumonia.  Not ideal.  I had so much to still do, and a cake to make, party to organise.  Decorations to finish...  But I was really sick.  You would think the ambulance ride would have made me realise that...but no.  I stayed one night, then managed to convince the hospital staff to give me the IV antibiotics as an outpatient (which meant coming in each day - having a new IV put in, etc).  What was I thinking???  But at least I got home around dinner time on my wee girl's birthday - so I got to see her (belatedly) opening her presents.

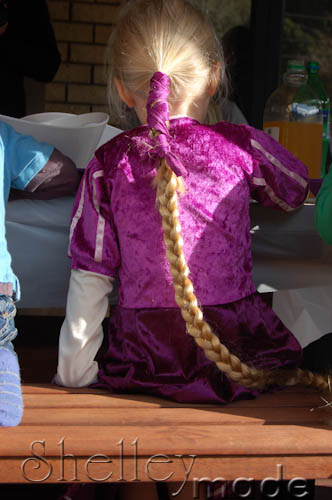
Anyway.  Luckily I had made the dress...


I had made the gift bags (more on them in a future post!)...


Designed and printed out the flags for the bunting.  I had decided on (and bought supplies) for the cake.  I had the bits and pieces for the games.

In stepped my family.  Husband shopped for the food.  My Dad and sister looked after the kids, and strung the bunting I had printed (not a quick job - sorry!).  


My sister was amazing.  She did all the party food while I was at the hospital, set the table, baked the cake, baked the cupcakes, made the frosting.  I had done the little braids, flowers and crowns for the cupcakes earlier, so luckily we didn't have to worry about them.


My friend Nicki stepped in last minute and decorated the cake for me as I just couldn't manage it - she did a wonderful job.  It looked exactly like I had planned.


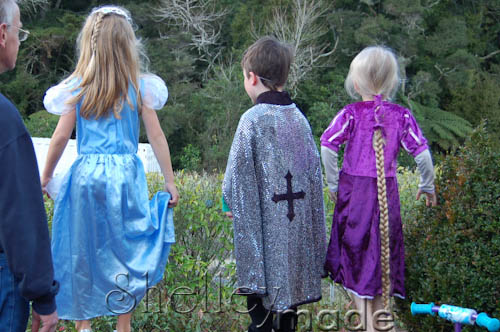
We had pass the parcel and pin the tail on Maximus (the horse from the Tangled movie), and a lot of running around and giggling in the garden by the little princesses and princes...
All in all - it went really well, and I am extremely grateful for all the assistance I had to make it happen.  Best of all - my daughter really enjoyed herself with her litle friends, and didn't worry about her sick Mum!


Thursday, 6 September 2012

The Rapunzel Dress

A dress for a princess...  Rapunzel to be precise!  That was the request for my daughter's 5th birthday.  It's the end of winter here...so it had to be warm, and I wanted it to be comfortable.  I know how much my little girl loves dressing up...and I knew this would get a lot of use!  It also had to look like the Rapunzel from the Tangled movie...  Hmmm...

This is what I came up with...


The bodice and skirt are stretch panne velvet (in Rapunzel colours!).  The long sleeves are a stretch interlock fabric.  The elastic around the hems and neckline is stretch lingerie elastic.  Can't get much more comfy than that!


She loves it.  Has worn it pretty much every day since her birthday...

I took a few shots of it under construction so you could see how I did it.

I drafted a bodice pattern from a long sleeve t-shirt I knew fitted well.  Used the basic sleeve, front and back - altering the neckline to be more of a sweetheart-style.   I also made a short sleeve - with gathering at the top - used the long sleeve pattern I drafted - cut it shorter, and added 2 inches to the centre, which I then gathered back in, to give the slight puff. 

Ribbons...oh the ribbons!  On the short sleeve - I spaced them out evenly, and topstitched them on.  Then I added a double-thickness band to the bottom of the short sleeve which was the same width as the long sleeve - to again create the puff.


On the bodice - I sewed the front and back together at the shoulder seams.  Tried it on her to make sure I was happy with the neckline.  Then cut a 3.5 inch section out of the centre front.  I replaced it with a section 4.5 inches wide from the skirt colour (to allow for seams) - which I had topstitched more ribbons in a criss-cross pattern.


Attached the sleeves, and sewed up the side seams of the bodice.

I made sure all my stretch was around the body for all parts of the dress...important to note!

The skirt is a half circle style, cut into panels.  There are a number of tutorials on the web to help you calculate half circle skirts...I looked through a few of those to figure out my dimensions.  I then divided it by 8 to get the single panel I needed.  I used one panel in the bodice colour.

I sewed the skirt up - since it is stretch, I didn't need any openings or closings or elastic.  Easy.  Just joined all the panels up.


Attached the bodice to the skirt - trying to match up the front panel with the bodice insert!  Used my overlocker to do that for maximum stretch.


To hem the skirt - I used lingerie elastic.  Attached it with a zigzag stitch (right sides together), then topstitched it with a triple stretch stitch on my machine.  Worked like a charm.  I used the same method on the neckline, and sleeve hems.

The hair...better not forget the hair!  I got a long wig from a local dollar store - cut sections of it out (leaving the stitching so it didn't fall out!), and make effectively extensions for her hair. 


All in all - very happy with how it turned out...and even happier that she loves it!

I have a post from the party coming up next...

Friday, 13 January 2012

A Fairy Party

It's been a while since the day - but for my daughter's fourth birthday - she asked to be a fairy, and to have a fairy party.  Silvermist to be exact, from the Disney Fairies movies.

So on top of all the creating I was doing for her presents (Fairy House, Jewellery, Handbag, etc), I also needed to make a fairy dress.  Oh, and make a multitude of little edible flowers and leaves for her birthday cake and cupcakes...

I found this pattern Simplicity 2559.  It's the toddler size (because my girl  is a slender build).  There is a size 3-8 one available as well, but I was certain it would be way too big in  the chest/waist for her, so I just lengthened the toddler one.

My version ended up looking like this (the only time before the day I would let her wear it!):


The crinoline wings from the pattern were a nightmare - floppy and just were not going to work - so I opted for store-bought white ones, which I added turquoise crystals too, sparkly silver glitter swirls, and tied a swath of the turquoise tulle around to tie into the dress.

I put a zip into the back - the original asked for velcro, plus to velcro the wings on but it just wasn't going to look so nice if she ever wore it without wings, so I changed that.  I did make the original belt, but in the end used another length of tulle as a sash - which I could tie in a bow at the back.

You cannot see from the photos - but it was very shimmery and sparkly - particularly the tulle.  I added some of the sparkly tulle  from the underskirt over the satin on one shoulder of the bodice.

She was way too excited on the day to get any good photos, but here is the back:


The front (you can see the necklace I made her to go with it)


Plus the all important wand!


Altogether I think it turned out quite well.  I made matching slippers and a hairclip to finish it all off.  There were times I SWORE never to sew with satin and tulle again :), but I'm over that now!


Here is a better look at the jewellery I made her for her birthday - the colours matched the dress perfectly.  I had no idea how to make jewellery before this - it just shows you how much you can learn from googling!  That, and finding a good place online to order what you need :)


If you are wondering why she is wearing tights and a long sleeve shirt underneath - it was winter here! :)  We got very lucky on the party day - it was lovely and sunny and quite warm.

I did get everything done in time.  Just.  We had the cake, complete with all my handmade little flowers, butterflies and leaves (now those took a while!):


...and the cupcakes and little flower biscuits/cookies


The girls all made their own fairy wands.  We used dowels I had wrapped in advance with ribbon.  The head of the wand was made from sheets of stiffened felt.  Feels like cardboard - but furry!  I cut them out beforehand too.  The girls chose their colours, then added lots of sparkly self-adhesive "jewels", stars and extra ribbons.  All things that were fun, but not messy!  Best of all, they got to create them themselves, and take them home to play with.


Then they burnt off all the sugar they had eaten by running around playing fairies outside with their new wands.


The best thing about the entire day - the absolute beam on my daughter's face as she had the BEST time with all her little fairy friends... :)