Shelley Made

Saturday, 28 April 2012

Reversible Baby Beanie Tutorial


This is a tutorial for sewing up my cut and sew, pre-printed reversible baby beanies which are available on Spoonflower

UPDATE AUGUST 2012:  After a number of requests for a paper pattern for these little beanies, I've made the full pattern pieces and a PDF version of this tutorial available for sale on my online store.  That way you can use any stretch knit fabric you like!

Requirements:
  • My pre-printed fabric beanie pattern
  • Coordinating thread
  • Sewing machine or serger.
  • Needle and thread
 

Instructions:

1.     First step – prewash your fabric.  It will shrink.  Cotton knit does, but that is not a problem as I’ve allowed for shrinkage on my pattern. 

2.      Cut out your pattern pieces.  You will need two (2) matching pieces for one beanie.  They should each look like this:


3.      Fold each piece in half down the centre, printed sides together.


4.      Sew down the short seam at the top and bottom of the pieces, using a 6mm (¼ inch) seam.  I use a serger, but if you use a regular machine, use a zig-zag or stretch stitch.


You should have this when you are done...four seams altogether:


5.      Open the pieces out, and place them right sides together.  Make sure you match the patterns!


6.      Pin the pieces together – leaving an opening of around 1.5 inches for turning.  I find it easier to change the direction of my pins so I don’t miss them!  The opening should be about 2 inches from the centre of the side...  This way your handsewing or maching stitching will be hidden under the cuff.


7.      Sew around the circumference, again either with a serger or regular zig-zag stitch.  Don’t forget to leave that opening!!


8.      Turn the beanie right way through using your opening... 


9.      Push the raw edges through, and give it a press.  This will give you a good line for stitching closed the opening. 


Push one end of the hat inside the other, and press around the fold line to give a nice finish. Nearly done!


10.   Close the opening.  I prefer to handstitch, taking very small stitches on alternate sides (I use my knee to hold the hat while I stitch).  You could always take a very very small seam on your sewing machine if you are averse to hand sewing...


11.   Turn up your cuff and you are done!  Easy as that.  J


There you go...an easy reversible beanie for a little baby.  Enjoy!
Coming soon..a tutorial for the matching reversible bibs!


Friday, 27 April 2012

Cut & Sew Beanies and Bibs

I'm rather excited...  I received my first set of my Cut & Sew fabric prints for babies yesterday, and today I found out the baby girl beanie design made the Top 10 in the Spoonflower Fabric of the Week competition! 

I was up late last night sewing one set up, so I could see how they turned out, before putting them up for sale today. 

This was the result:

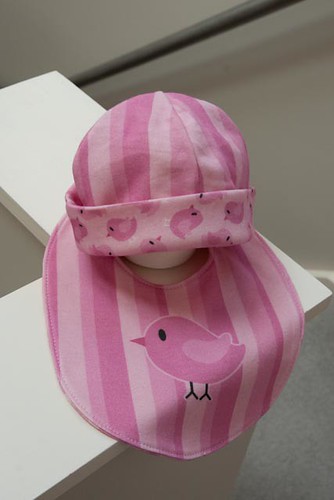
Reversible Baby Beanie and Bib - Girls

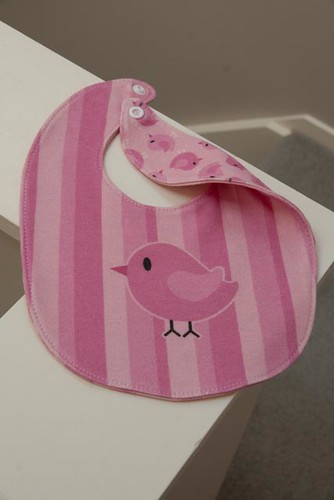
Reversible Bib


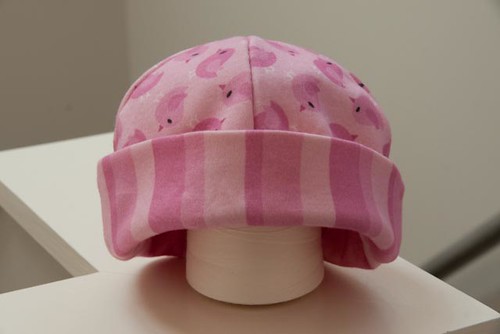
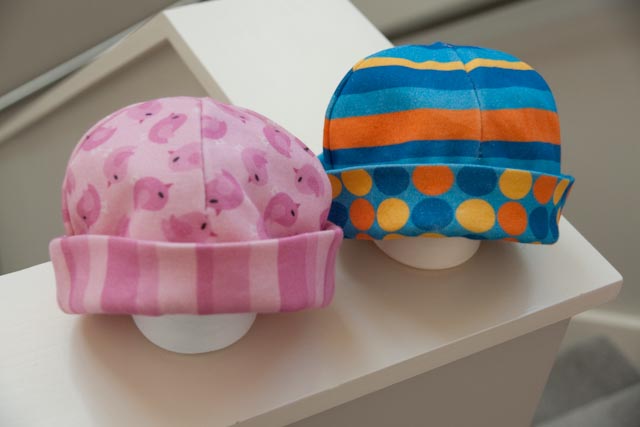
Reversible Beanie

They are sized to be printed on Spoonflower's lovely soft organic knit (as it has a nice stretch to it).  I have a set of 5 reversible beanies, and a set of 7 reversible bibs - one for boys, and one for girls.  Each set fits on a yard of fabric.

Super easy to make.  I designed the bib back when my daughter was a tiny baby.  She had reflux, and we went through a LOT of bibs.  I wanted something not too big, and soft around her little neck.  I only wish Spoonflower had been around 4 years ago!


Each of the fabric designs used in the patterns are also available separately, so that you can make matching blankets, etc.

The designs are printed directly onto the organic knit fabric at Spoonflower.  There are the baby girl beanies (click on the images to see the details):

Reversible Baby Beanies - Baby Girl!

These are the baby boy's:

Reversible Beanies - Baby Boy

...and of course there had to be matching bibs, girls:

Reversible Bibs - Baby Girl

...and boys...

Reversible Bibs - Baby Boy

I'll be sewing more up over the weekend, so will have more photos to share soon, and I think I'll do a tutorial for them.  The instructions are printed on the fabric, but it never hurts to have some step by step photos!

I'm very pleased with how they turned out - what do you think??

I've just finished a tutorial on making the beanies - you can see it here.  I'll have one for the bibs soon.

:)

Monday, 23 April 2012

My Fabric in Use...

I'm always thrilled to see what people make with my fabric, and I've had a couple of opportunities to see the end result lately.

First - Janice of Bluebird Mountain on Etsy has made some lovely Kindle covers.  She used both the grey and mid blue colours of my personalised fabric, which I designed for her with "Read" and "Books"


The other is Susanne, who recently posted about the neat quilted pillow she made on her blog Quilt It Out:

names fabric quilted pillow

If you have made something with one of my fabrics, and would like to share it, I've created a Flickr group.  Feel free to add to it - I love seeing what you make! :)

Thursday, 22 March 2012

The Emma Bag - Using Personalised Fabric

I made a bag for my daughter's birthday using the Katybag pattern from the very talented LiEr of iKatbag.  She liked it so much, I decided to make one for my niece for her upcoming birthday.  What 3 year old doesn't need their own little handbag :)

It measures about 6.5" wide by about 10" tall (including the strap) - so just right for a wee girl.


I'm really pleased with how it has turned out...I finished it late last night. 


I used my own fabric designs - an allover Emma print with a little daisy, and a coordinating one that was just the daisies.  The best part - the entire bag (both sides!) only needs a fat quarter of linen-cotton fabric! 


I even had a little over to make a matching coin/what-have-you purse.


The resulting actual fabric looked like this:


It's fully lined, and has a magnetic clasp - making it easy for little hands (and no so little ones!).

I love the piping detail, and it's not too frightening once you get the hang of it - in fact, I think I'm going to pipe a LOT more now.


As far as the construction went - pretty straightforward (sorry for the night time shots - it's the only time I get to sew with preschoolers!):

Cut out and interface the pieces...


Add the piping

Add the clasp and sew up the outer and inner bags.


Then put it all together


To look like this :)


Let's hope she likes it!

UPDATE:  I've had a few people contact me asking if they can get the fabric I used in their own name.  Yes you can - on my online store http://shop.shelleymade.com.

Sunday, 18 March 2012

Mr Mikey Robot Fabric Collection Has Landed!

It was with great excitement that I opened my latest package from Spoonflower.  The samples for the robot fabrics that I designed for my son had arrived!


I'm really happy with how they have printed and I'm looking forward to designing a quilt for my wee boy with them in the Kona Cotton.  So happy in fact that I've put them up for sale on Spoonflower.

I have Mr Mikey himself:


Mr Mikey's Legs in a stripe (think this is my favourite):


Mr Mikey's buttons:


Smiling Mr Mikey in small:


...and large:

and finally Robot Waves:


They all coordinate with the Robot Cheater Quilt I designed:

Mr Mikey Robot Tumbler Cheater Quilt 42 inch


Which also printed very nicely:


All in all - a great day!  Made even better by 2 year old's reaction to the fabric - big smiles and wanted to run around the house with it as a cape :)

Sunday, 11 March 2012

Robot Cheater Quilt - Mr Mikey Robot!

It's contest time again at Spoonflower.  This time - the theme is Robot Cheater Quilts, and this is my entry:


Well, to be precise - the quilt design in the centre is my entry!  I got a little carried away with the coordinates :).  You can view the entire collection here.

If you would like to see all the other entries, and perhaps have a quick vote - click here, then click on "Vote for your favourites".  There are some really neat entries this week.

I'm currently waiting on my proofs to arrive - so the fabric itself should be up for sale in about a week. :)

Personalised Name Fabric Available!

If you are looking for personalised name fabric - then you have come to the right place!  I have a range of different designs, and layouts available - all in any name and any colours.

The online store is now open - either click on the image below to enter, or head to http://shop.shelleymade.com to browse the options


I announce new designs on my Facebook page - so feel free to "like" me over there to keep up to date. 

Thank you for your interest!


All designs, images and details shown here © Shelley Aakjaer 2011-2018.